Hosting a Static Website with AWS S3 and CloudFront
With the rising popularity of client-side rendering frameworks such as Angular and Ember, it has become extremely easy to build your own website without needing a complicated or powerful backend. Combined with Amazon S3 static website hosting, you don’t even need a host anymore.
Before going forward, make sure that you are familiar with using the AWS Management Console and the AWS Command Line Interface.
Storing Your Site in S3
First, you’ll need to create an S3 bucket to store your content. The bucket name doesn’t have to match your domain, but it makes things clearer.
Upload a sample index.html to the root of the bucket
<html>
<head>
    <title>Hello World</title>
</head>
<body>
    Hello World
</body>
</html>
Then, open the Properties for the bucket, and select Permissions. Click Edit Bucket Policy to give global read access to all files in this bucket

{
  "Version":"2012-10-17",
  "Statement":[{
    "Sid":"PublicReadGetObject",
        "Effect":"Allow",
      "Principal": "*",
      "Action":["s3:GetObject"],
      "Resource":["arn:aws:s3:::yourdomain.com/*"
      ]
    }
  ]
}
Next, enable website hosting. Select Static Website Hosting, and select Enable Website Hosting.

With just these steps complete, you should be able to view your website at the Endpoint provided.
# Be sure to replace us-west-2 with the region your bucket was created in
curl http://yourdomain.com.s3-website-us-west-2.amazonaws.com
Setting up your SSL certificate
Before you can configure a new distribution, you need to upload the SSL certificate for your domain to AWS Identity and Access Management(IAM).
If you do not already have an SSL certificate, you can generate one for free from StartSSL.
Once you have your public certificate and private key ready, you can upload it to IAM.
aws iam upload-server-certificate --server-certificate-name certificate_object_name --certificate-body file://public_key_certificate_file --private-key file://privatekey.pem --certificate-chain file://certificate_chain_file
Creating a CloudFront Distribution
Now, you can create a CloudFront distribution to sit in front of S3, and serve your content through your own domain.
Navigate to the CloudFront console, and create a new Web Distribution.
There are a lot of options for a distribution, but they’re all changeable after creation. See the CloudFront documentation for details. For now, focus on the options related to your domain and S3 bucket.
Set the Origin Domain Name to the Endpoint provided in the Static Website Hosting configuration for your S3 bucket (e.g. yourdomain.com.s3-website-us-west-2.amazonaws.com).
NOTE: Do not use your S3 bucket as the origin directly. This prevents you from using a root object for subpaths (e.g. http://yourdomain.com/blog -> http://yourdomain.com/blog/index.html transparently).
Enable HTTPS under the Viewer Protocol Policy, and set the Alternate Domain Name to yourdomain.com, and www.yourdomain.com.
Set the SSL Certificate to the one you uploaded to IAM.
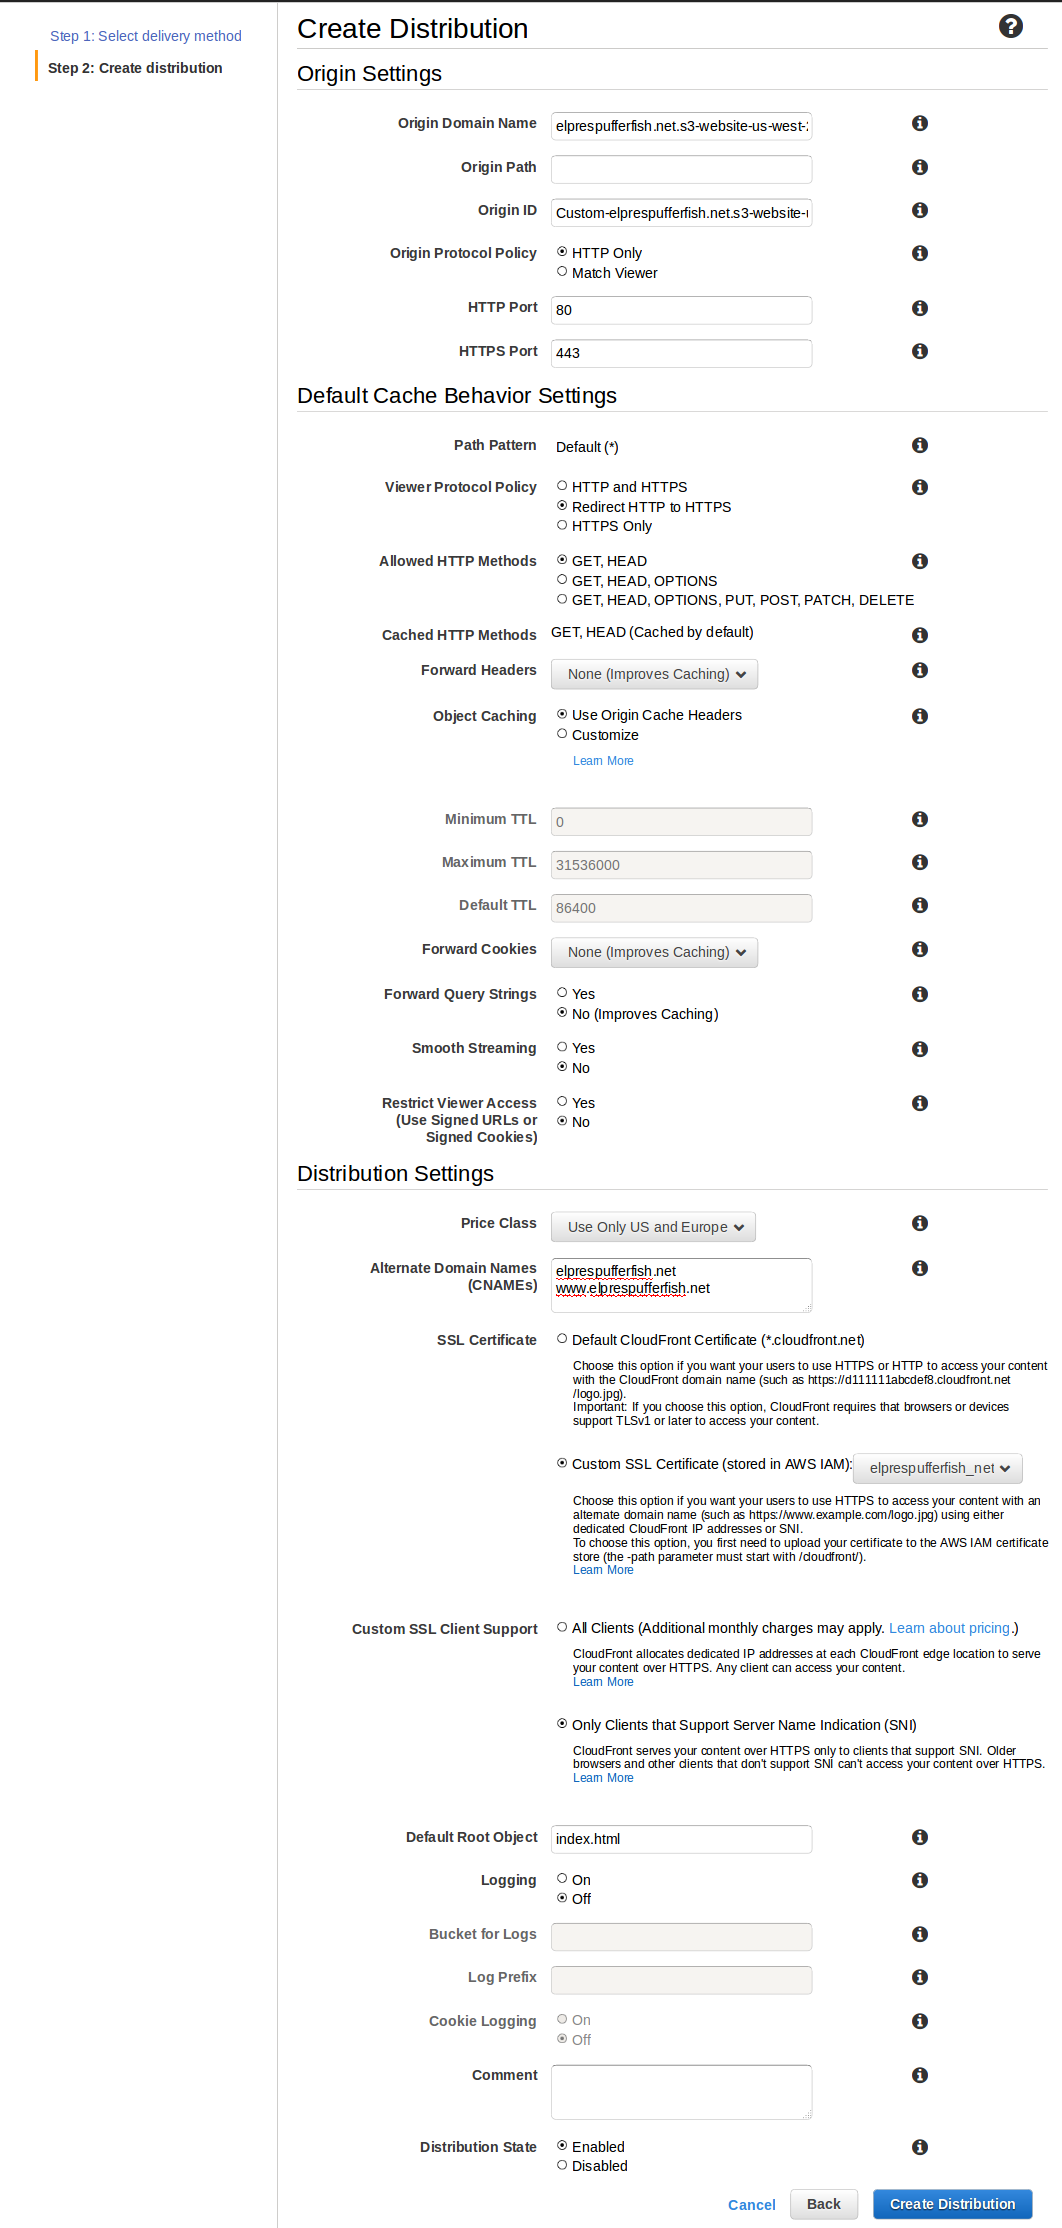
CloudFront will take about 15 minutes to create your distribution.
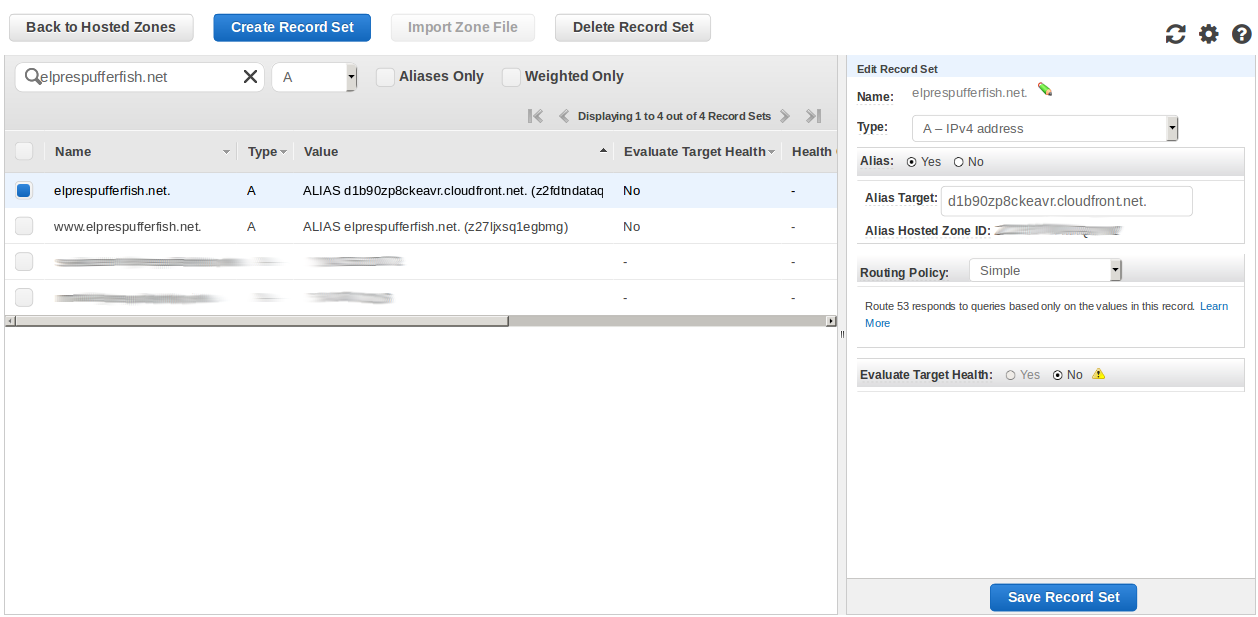
Directing DNS
Finally, you need to create an A DNS record as an ALIAS from yourdomain.com. to the domain name of your new CloudFront distribution,
and another A record as an ALIAS from www.yourdomain.com. to yourdomain.com.
Where to Go From Here
At this point, you should be able to view your website at https://www.yourdomain.com/
Next, you’ll likely want to start integrating your website with more of AWS backend services.
Consider checking out Login with Amazon or AWS Cognito to handle login for your site and generate per-user temporary credentials to call other AWS services with.
If you need more complicated logic such as interacting with DynamoDB, check out Amazon API Gateway and AWS Lambda to create and operate your backend without the hassle of managing EC2 instances.