Setting Up a Simple Mail Server in EC2
After buying a domain, and perhaps setting up a blog on it, it’d be great to be able to send and receive email from that domain.
Depending on your use case, you may prefer to use Amazon WorkMail once it launches, but until then…
- Assumptions
- Create a New EC2 Instance
- Add DNS Records
- Install and Configure Software
- Postfix
- Adding a no-reply Address
- SpamAssassin
- Amazon Simple Email Service Integration
- Where to Go From Here
Assumptions
- You are setting up an email server for
yourdomain.com - You are familiar with AWS and the AWS Management Console
- You are comfortable with the Linux command line
Create a New EC2 Instance
First, you will need a dedicated host to send and receive mail.
Since you won’t likely send or receive much traffic, pick the cheapest instance type available (currently t2.micro). This guide assumes that you choose the default Amazon Linux AMI (currently Amazon Linux 2015.03.1 HVM).
Set Shutdown Behavior to Stop instead of Terminate, and enable Termination Protection. This helps avoid accidental outtages.

If you opt not to use a t2.micro, ensure that you use a host with EBS-backed storage. Otherwise, you run the risk of losing your mail if the instance unexpectedly dies. Ensure that your root volume is not set to Delete on Termination.

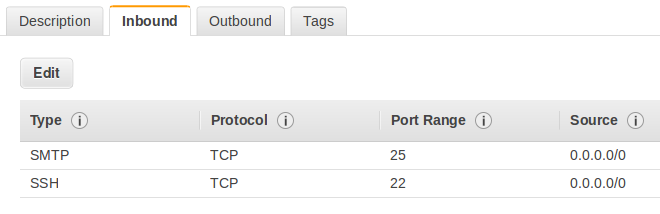
The mail server will need open ports specific to e-mail, so create a dedicated EC2 Security Group rather than share one with other hosts. Mail servers listen for new mail via SMTP, so open inbound TCP port 25.
Next, allocate an Elastic IP Address and associate it to the new instance. This provides a stable IP address for your mail server in case your EC2 instance must be replaced.
Add DNS Records
Next, you’ll need to set up the required DNS records so that the world knows to use the new instance to receive mail for your domain.
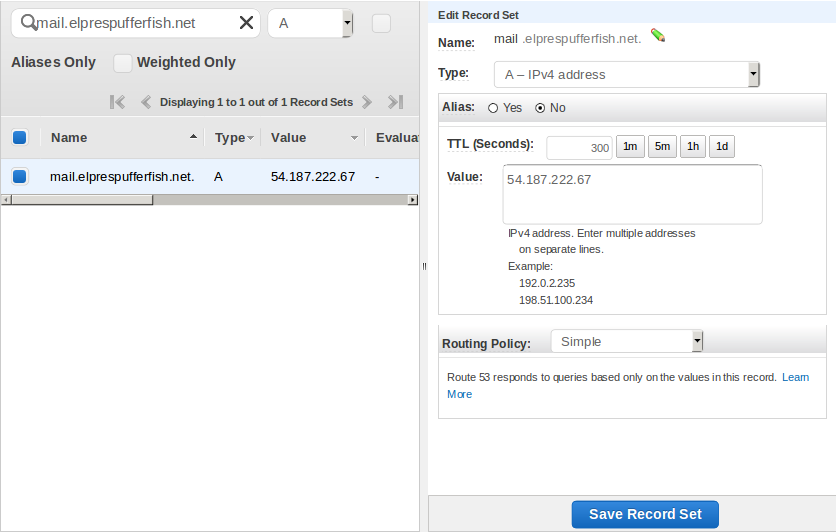
First, create an A record for your host from mail.yourdomain.com. to your new Elastic IP address.
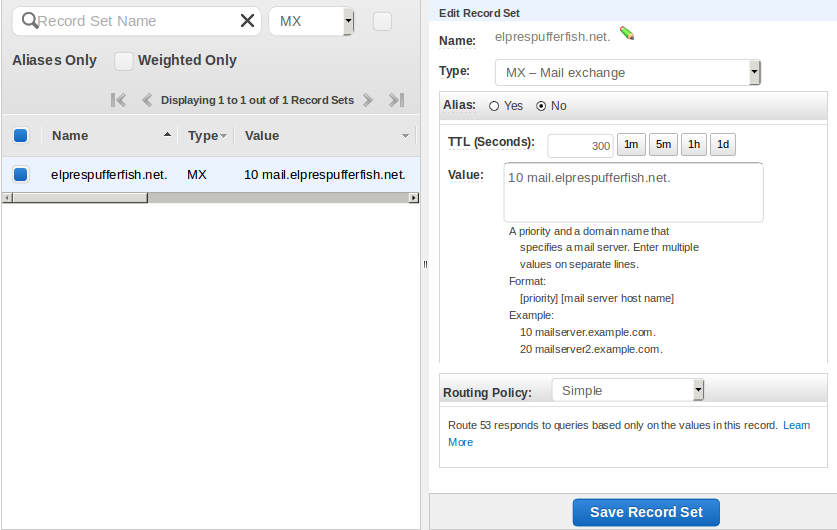
Then, create an MX record for yourdomain.com to 10 mail.yourdomain.com.
Spam-fighting software will often require that any server sending email has a valid Reverse DNS record. contact EC2 to create this record.
Install and Configure Software
Now we need to SSH into the new host to configure the email services.
First, make sure the host knows it’s own name
# /etc/hosts
127.0.0.1   mail.yourdomain.com localhost localhost.localdomain
# /etc/sysconfig/network
# ...
HOSTNAME=mail.yourdomain.com
# ...
Postfix
We’ll be using Postfix as our Mail Transfer Agent, or MTA, to send and receive email.
$ sudo yum install postfix
The Postfix site has some great documentation, but the minimum changes we need to make are:
# /etc/postfix/main.cf
mydestination = $myhostname, localhost.$mydomain, localhost, $mydomain
mydomain = yourdomain.com
myhostname = mail.yourdomain.com
mynetworks_style = host
myorigin = $mydomain
Now that Postfix has been configured, start it and set it to start automatically on reboot
$ sudo chkconfig --add postfix
$ sudo service postfix start
Next, verify that you can send mail
$ sudo yum install mailx
$ mail you@yourExistingEmailProvider
Subject: Test

This is a test email from my brand new email server!
.
And receive mail from the outside world, by sending an email to ec2-user@yourdomain.com from your existing email account.
You can read it from your SSH terminal via mail
Adding a no-reply Address
If you’ll be sending notifications or other non-interactive e-mails, it may be useful to have a ‘from’ address that simply drops all incoming mail.
First, add a devnull user
# /etc/aliases
devnull: /dev/null
Then, add a virtual alias map for Postfix
# /etc/postfix/main.cf
virtual_alias_maps = hash:/etc/postfix/virtual
Then, alias the no-reply address to the new devnull user
# /etc/postfix/virtual
no-reply@yourdoman.com devnull
Finally, make sure Postfix knows about the new configuration
$ sudo newaliases
$ sudo postmap /etc/postfix/virtual
$ sudo service postfix reload
SpamAssassin
Now that you can send and receive email, you need to install SpamAssassin to flag or drop unwanted e-mail.
$ sudo yum install spamassassin
$ sudo groupadd spamd
$ sudo useradd -g spamd -s /sbin/nologin spamd
$ sudo chkconfig --add spamassassin
Follow the SpamAssassin documentation to set up spamfilter.sh and integrate with postfix, then restart the services.
$ sudo service spamassassin start
$ sudo service postfix reload
Verify that you can still send and receive mail as before.
You should now see additional X-Spam-* headers injected by SpamAssassin.
Amazon Simple Email Service Integration
At this point, you should be able to send and receive email, but cautious email servers may still drop messages from your domain since you’re not well known.
Among other things, Amazon SES helps ensure that your outgoing messages will not be considered spam by piggybacking on top of Amazon’s filtering and reputation.
See the SES documentaton for Postfix integration to route your outgoing mail through SES.
Where to Go From Here
At this point, you can send and receive mail, but must be logged into your mail server to read it.
To make things easier for you and and anybody else using this server, you’ll likely either want to forward your messages to existing accounts, set up an IMAP/POP3 server such as Dovecot, or perhaps set up a webmail service such as Roundcube.